


cerasonar installation frames (backboxes)
1291
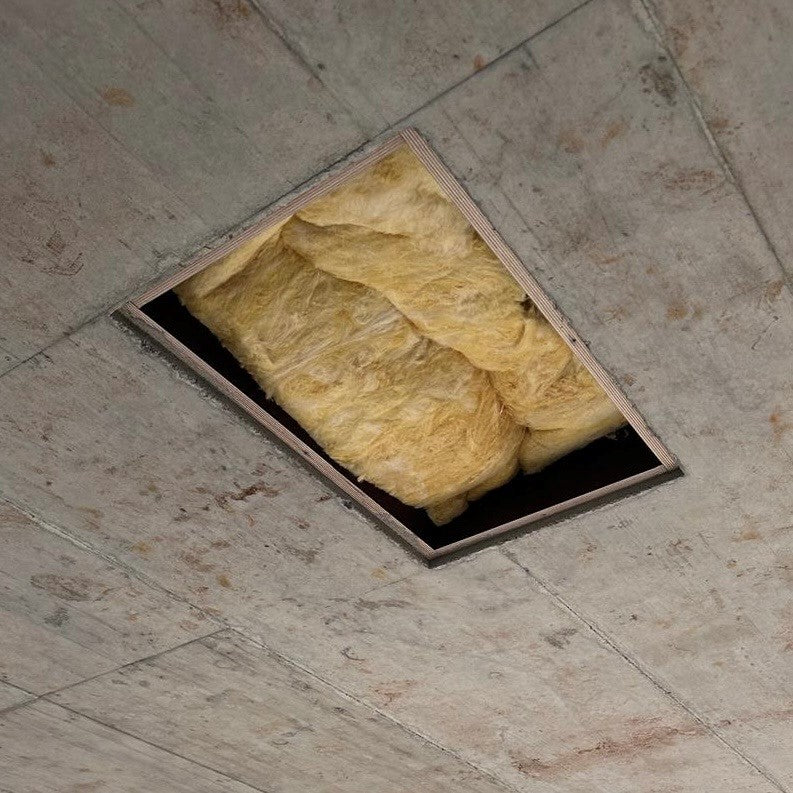
El marco de instalación mejorado para cerasonar ahora se puede utilizar para aún más aplicaciones. Gracias a su construcción estable de madera contrachapada impermeable y al uso del material aislante Basotect®, también es ideal como caja trasera para reducir eficazmente el ruido posterior.
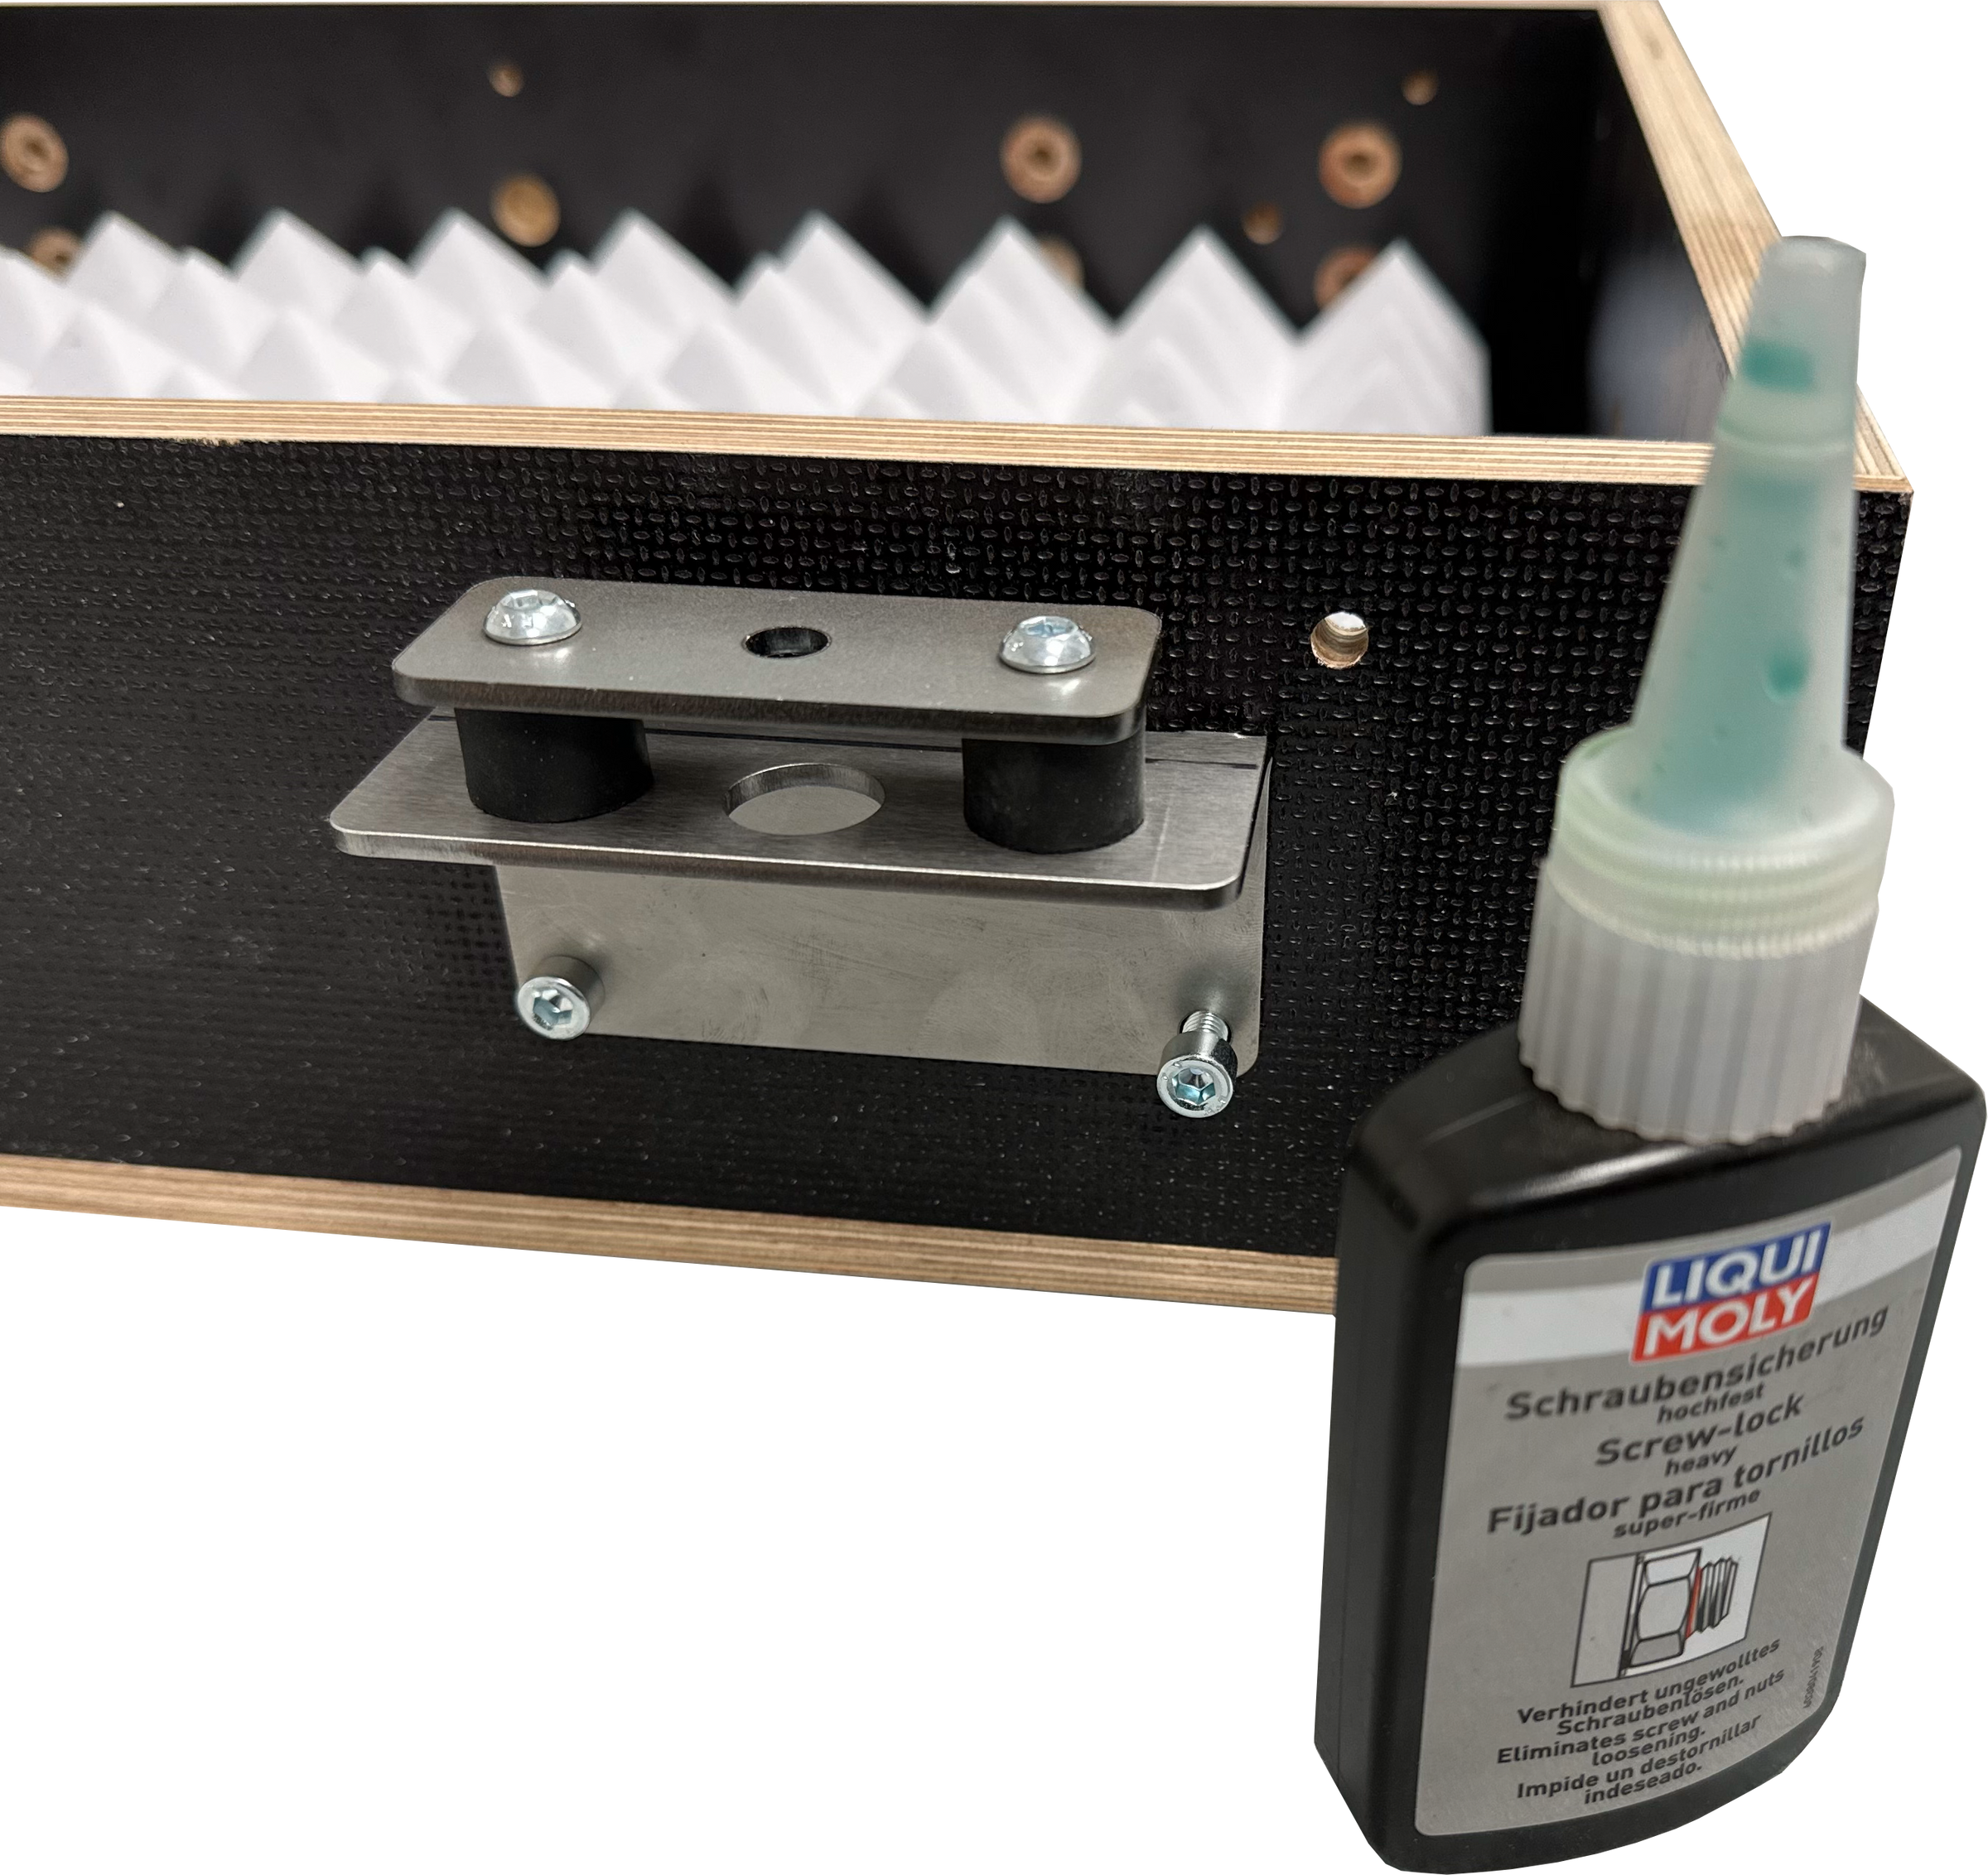
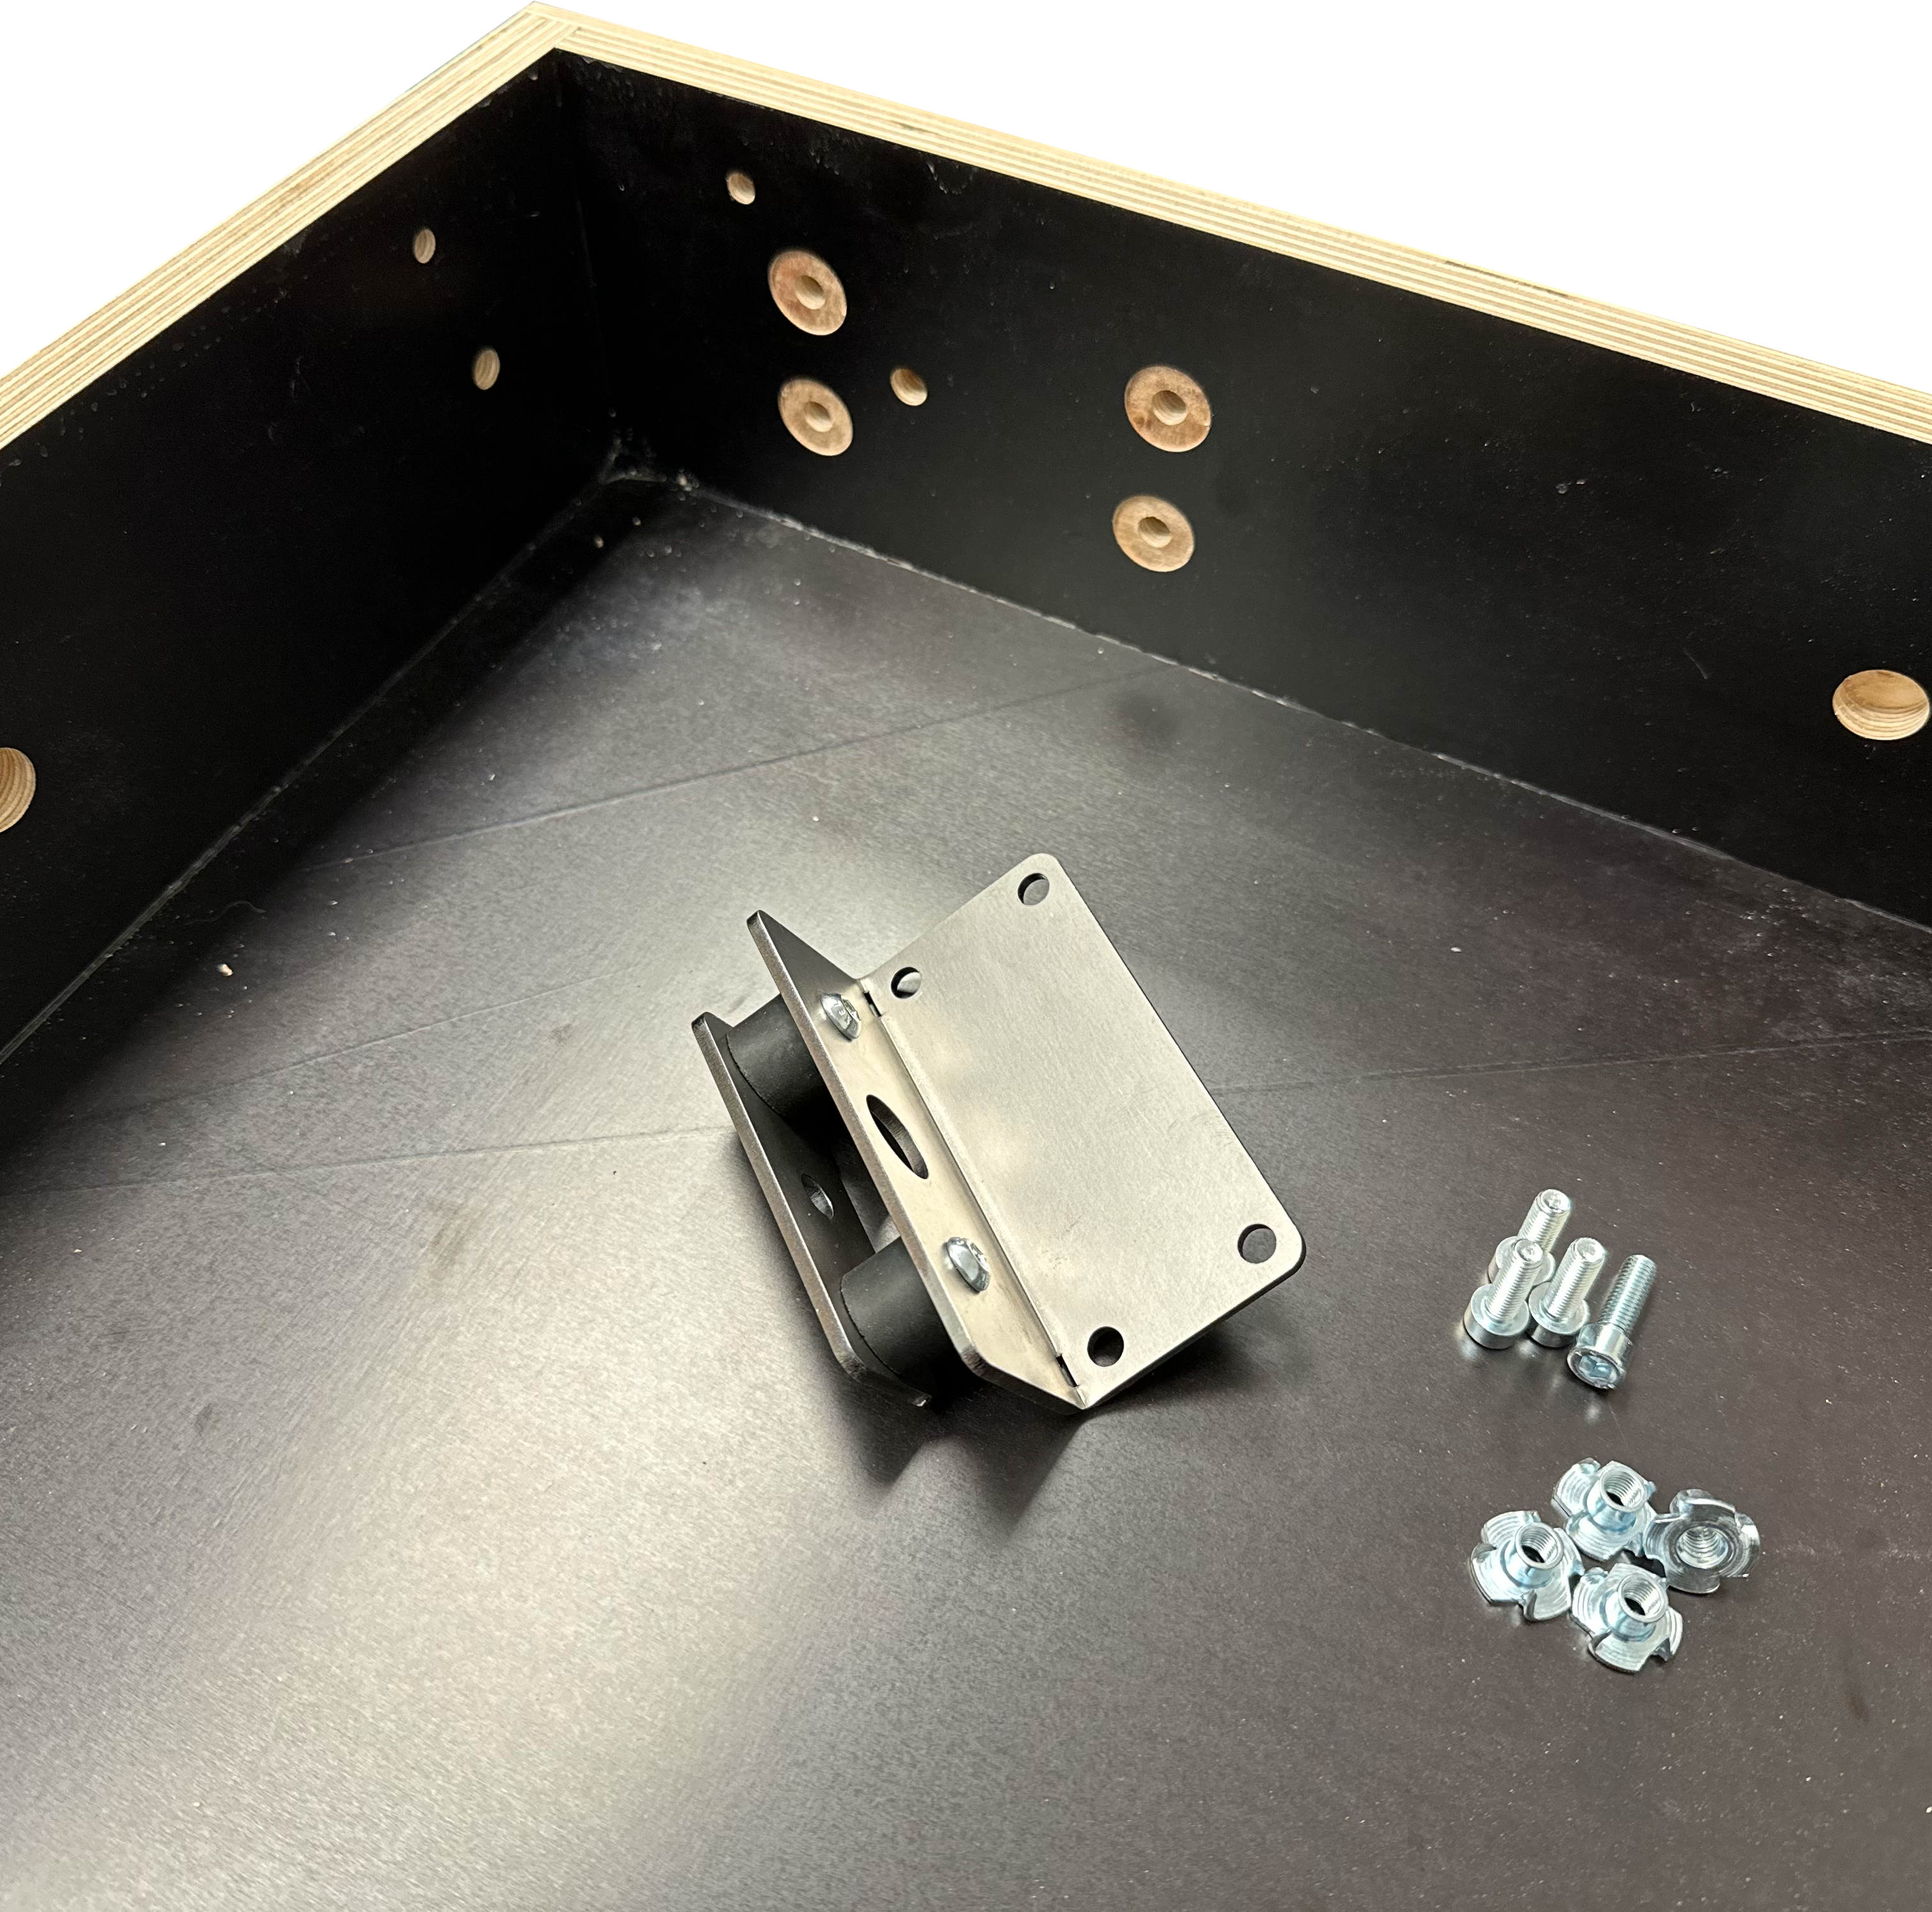
Los innovadores amortiguadores de vibraciones opcionales ahora también permiten reducir el ruido estructural.
La carcasa viene preperforada y, por lo tanto, se puede utilizar para diversos entornos de instalación, tales como:
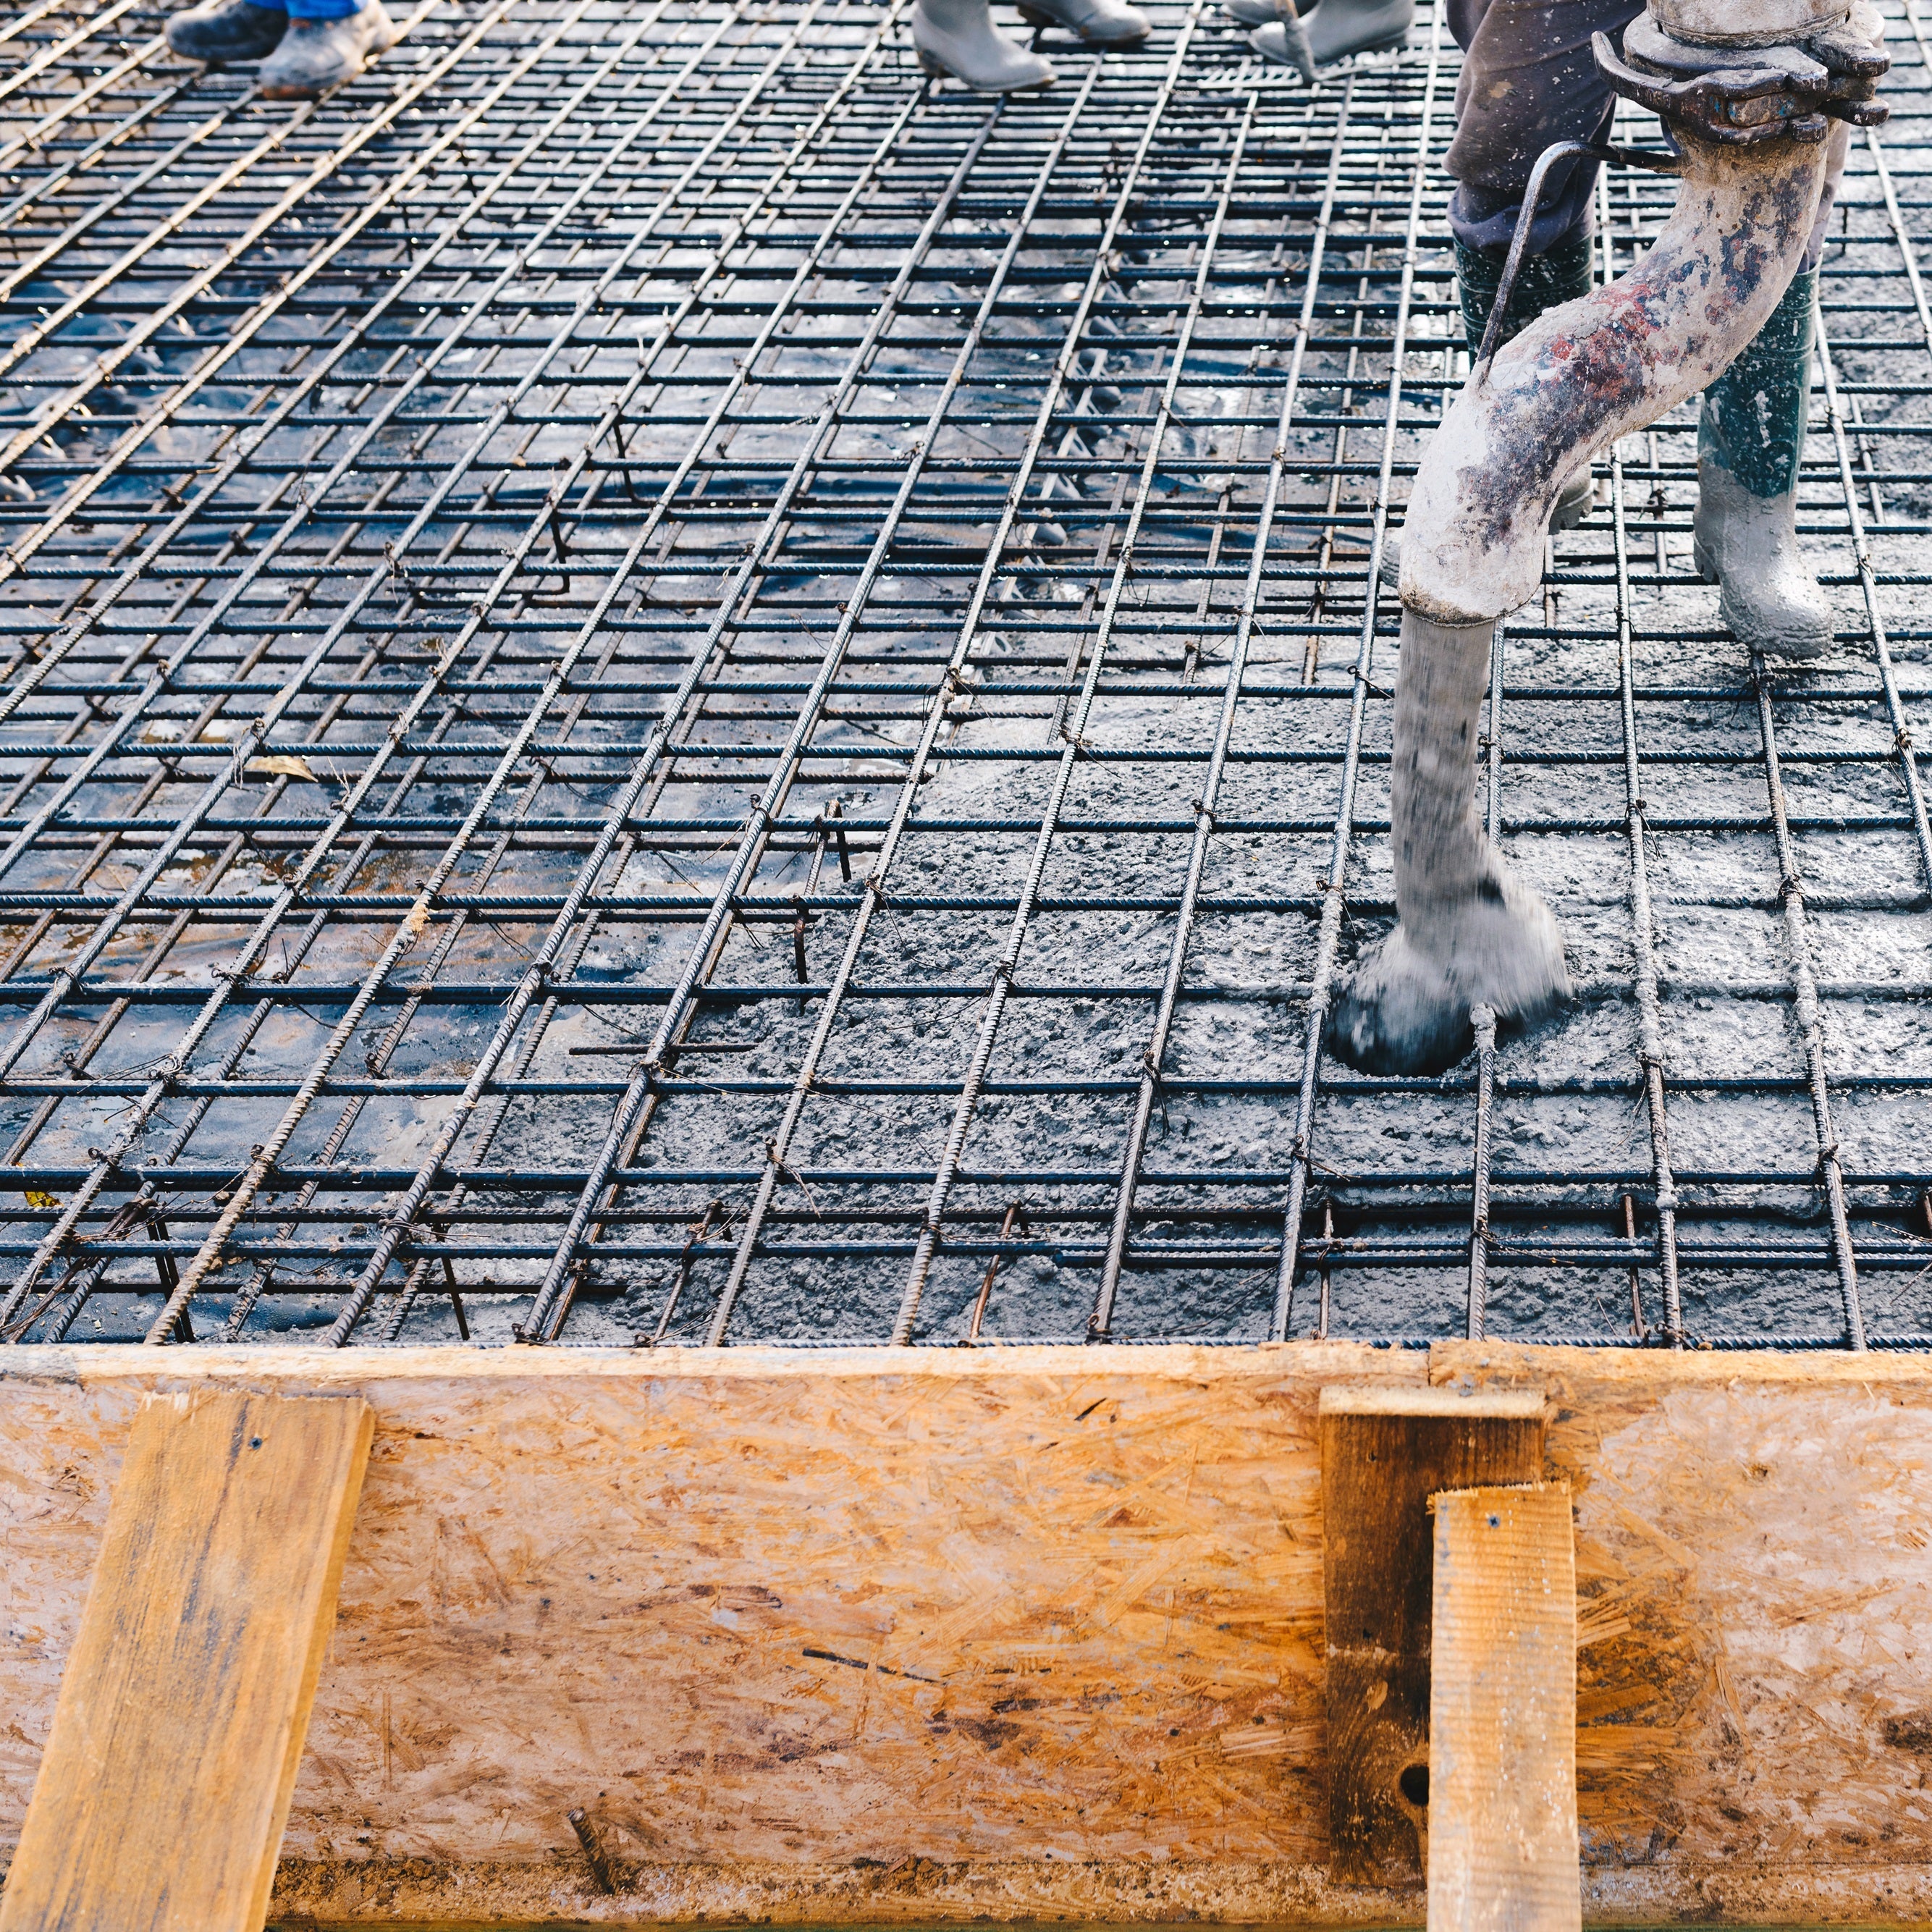
- Instalación en hormigón in situ
- Instalación en mampostería
- Fácil instalación en el techo
- Instalación con amortiguadores de vibraciones (techo suspendido de yeso)
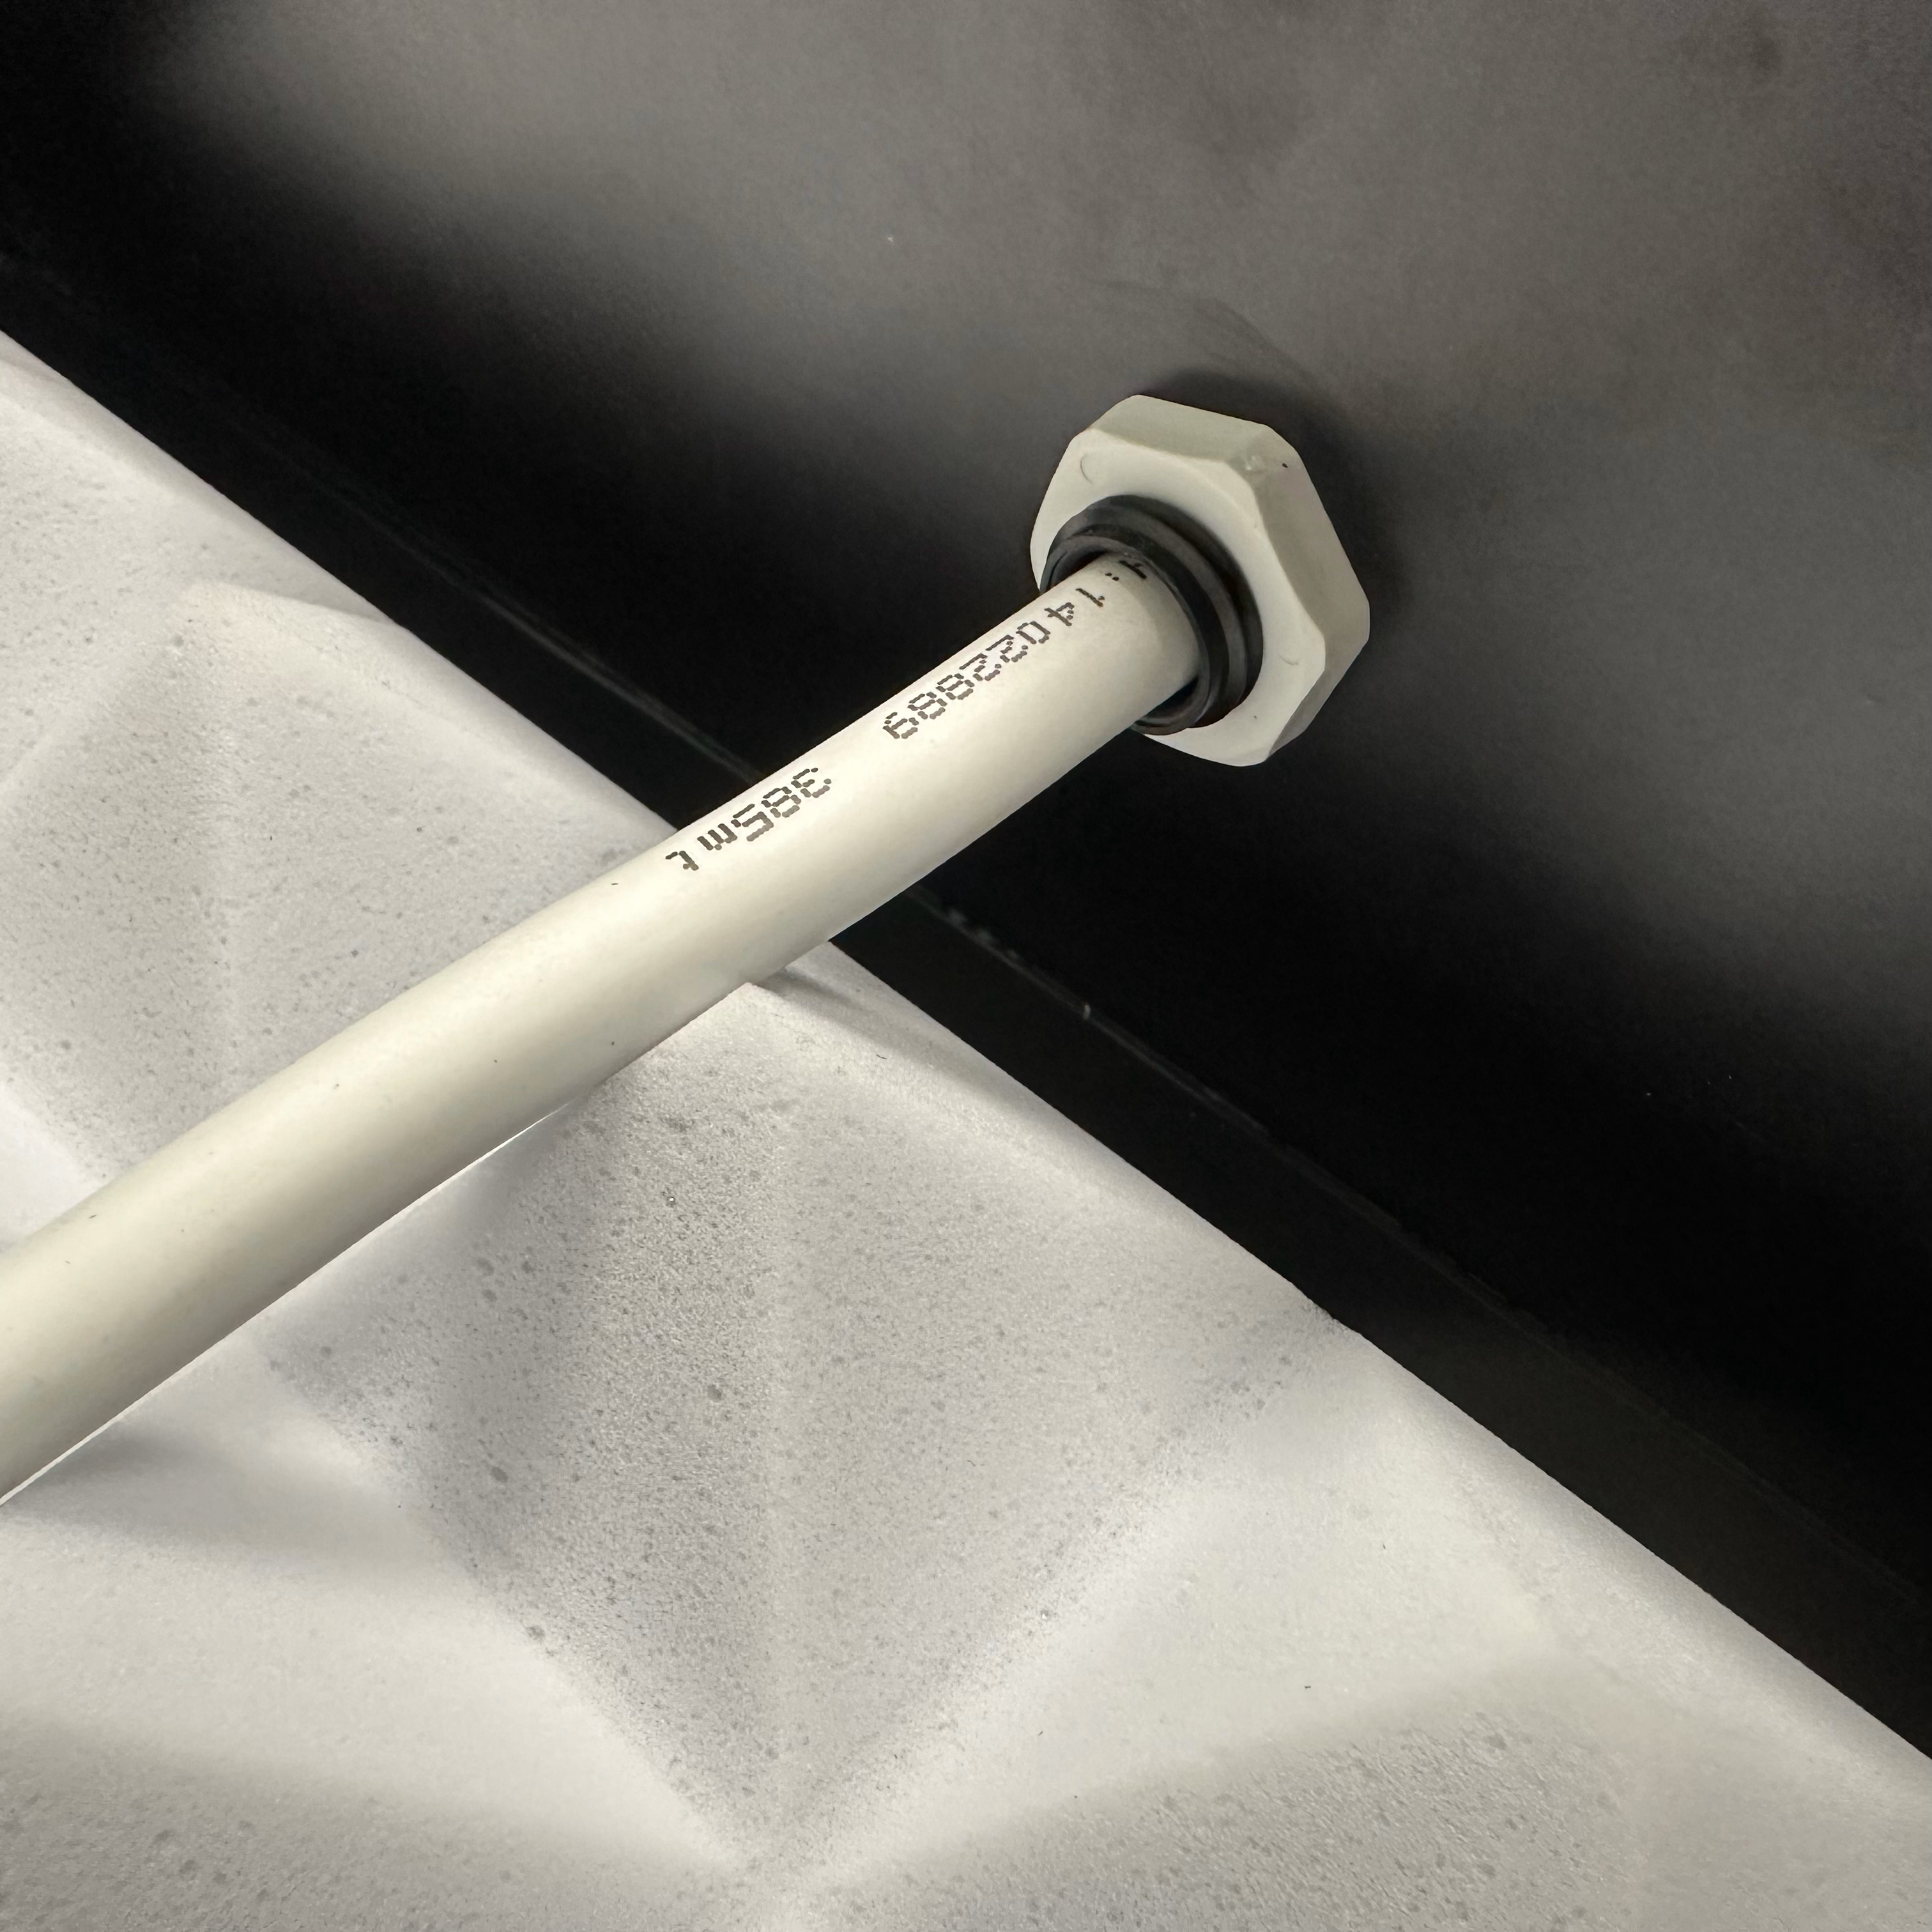
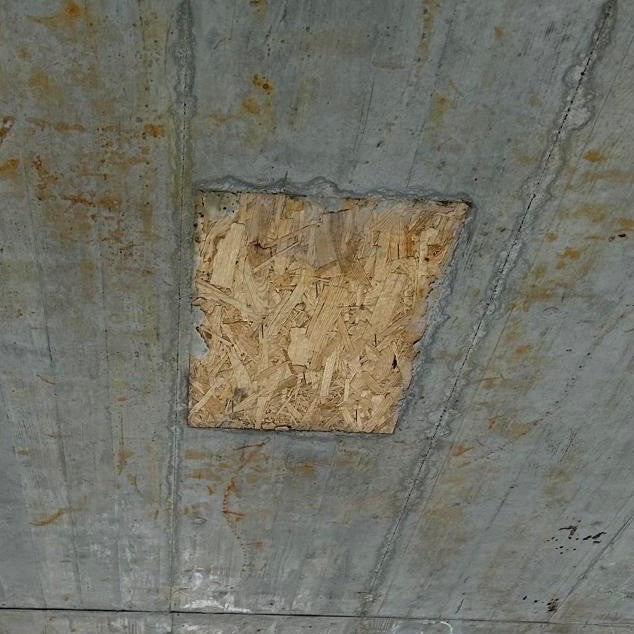
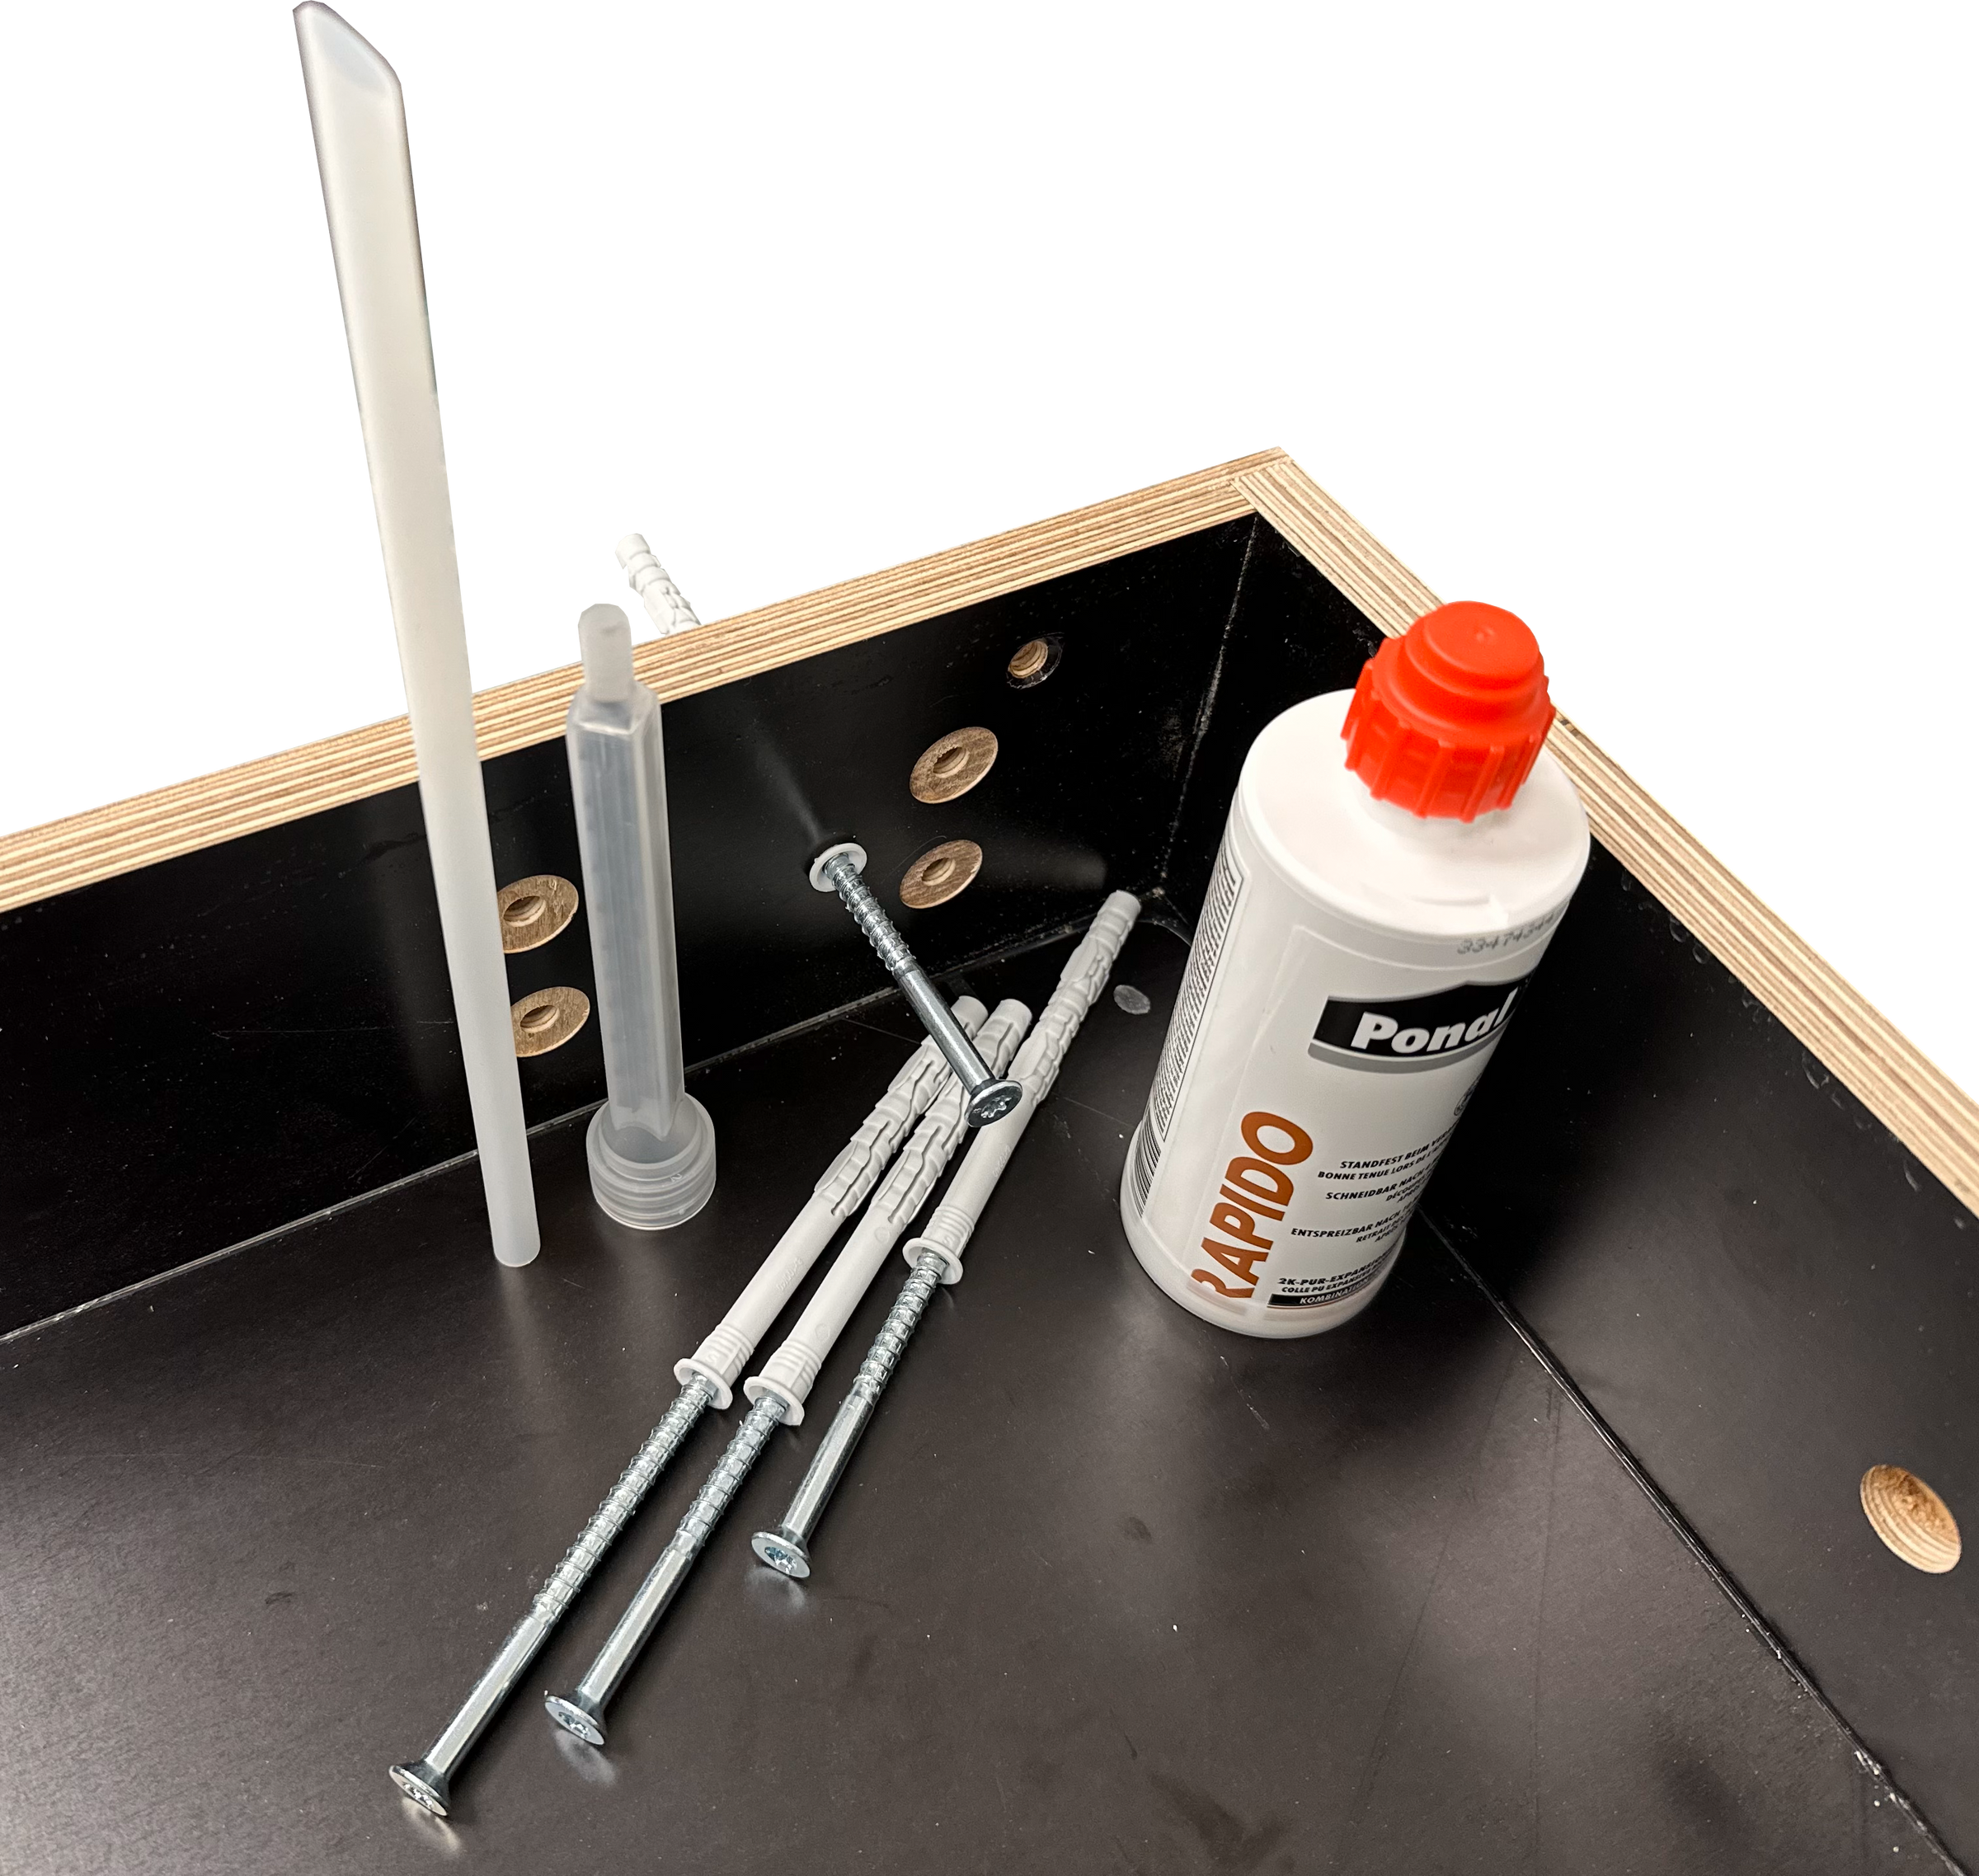
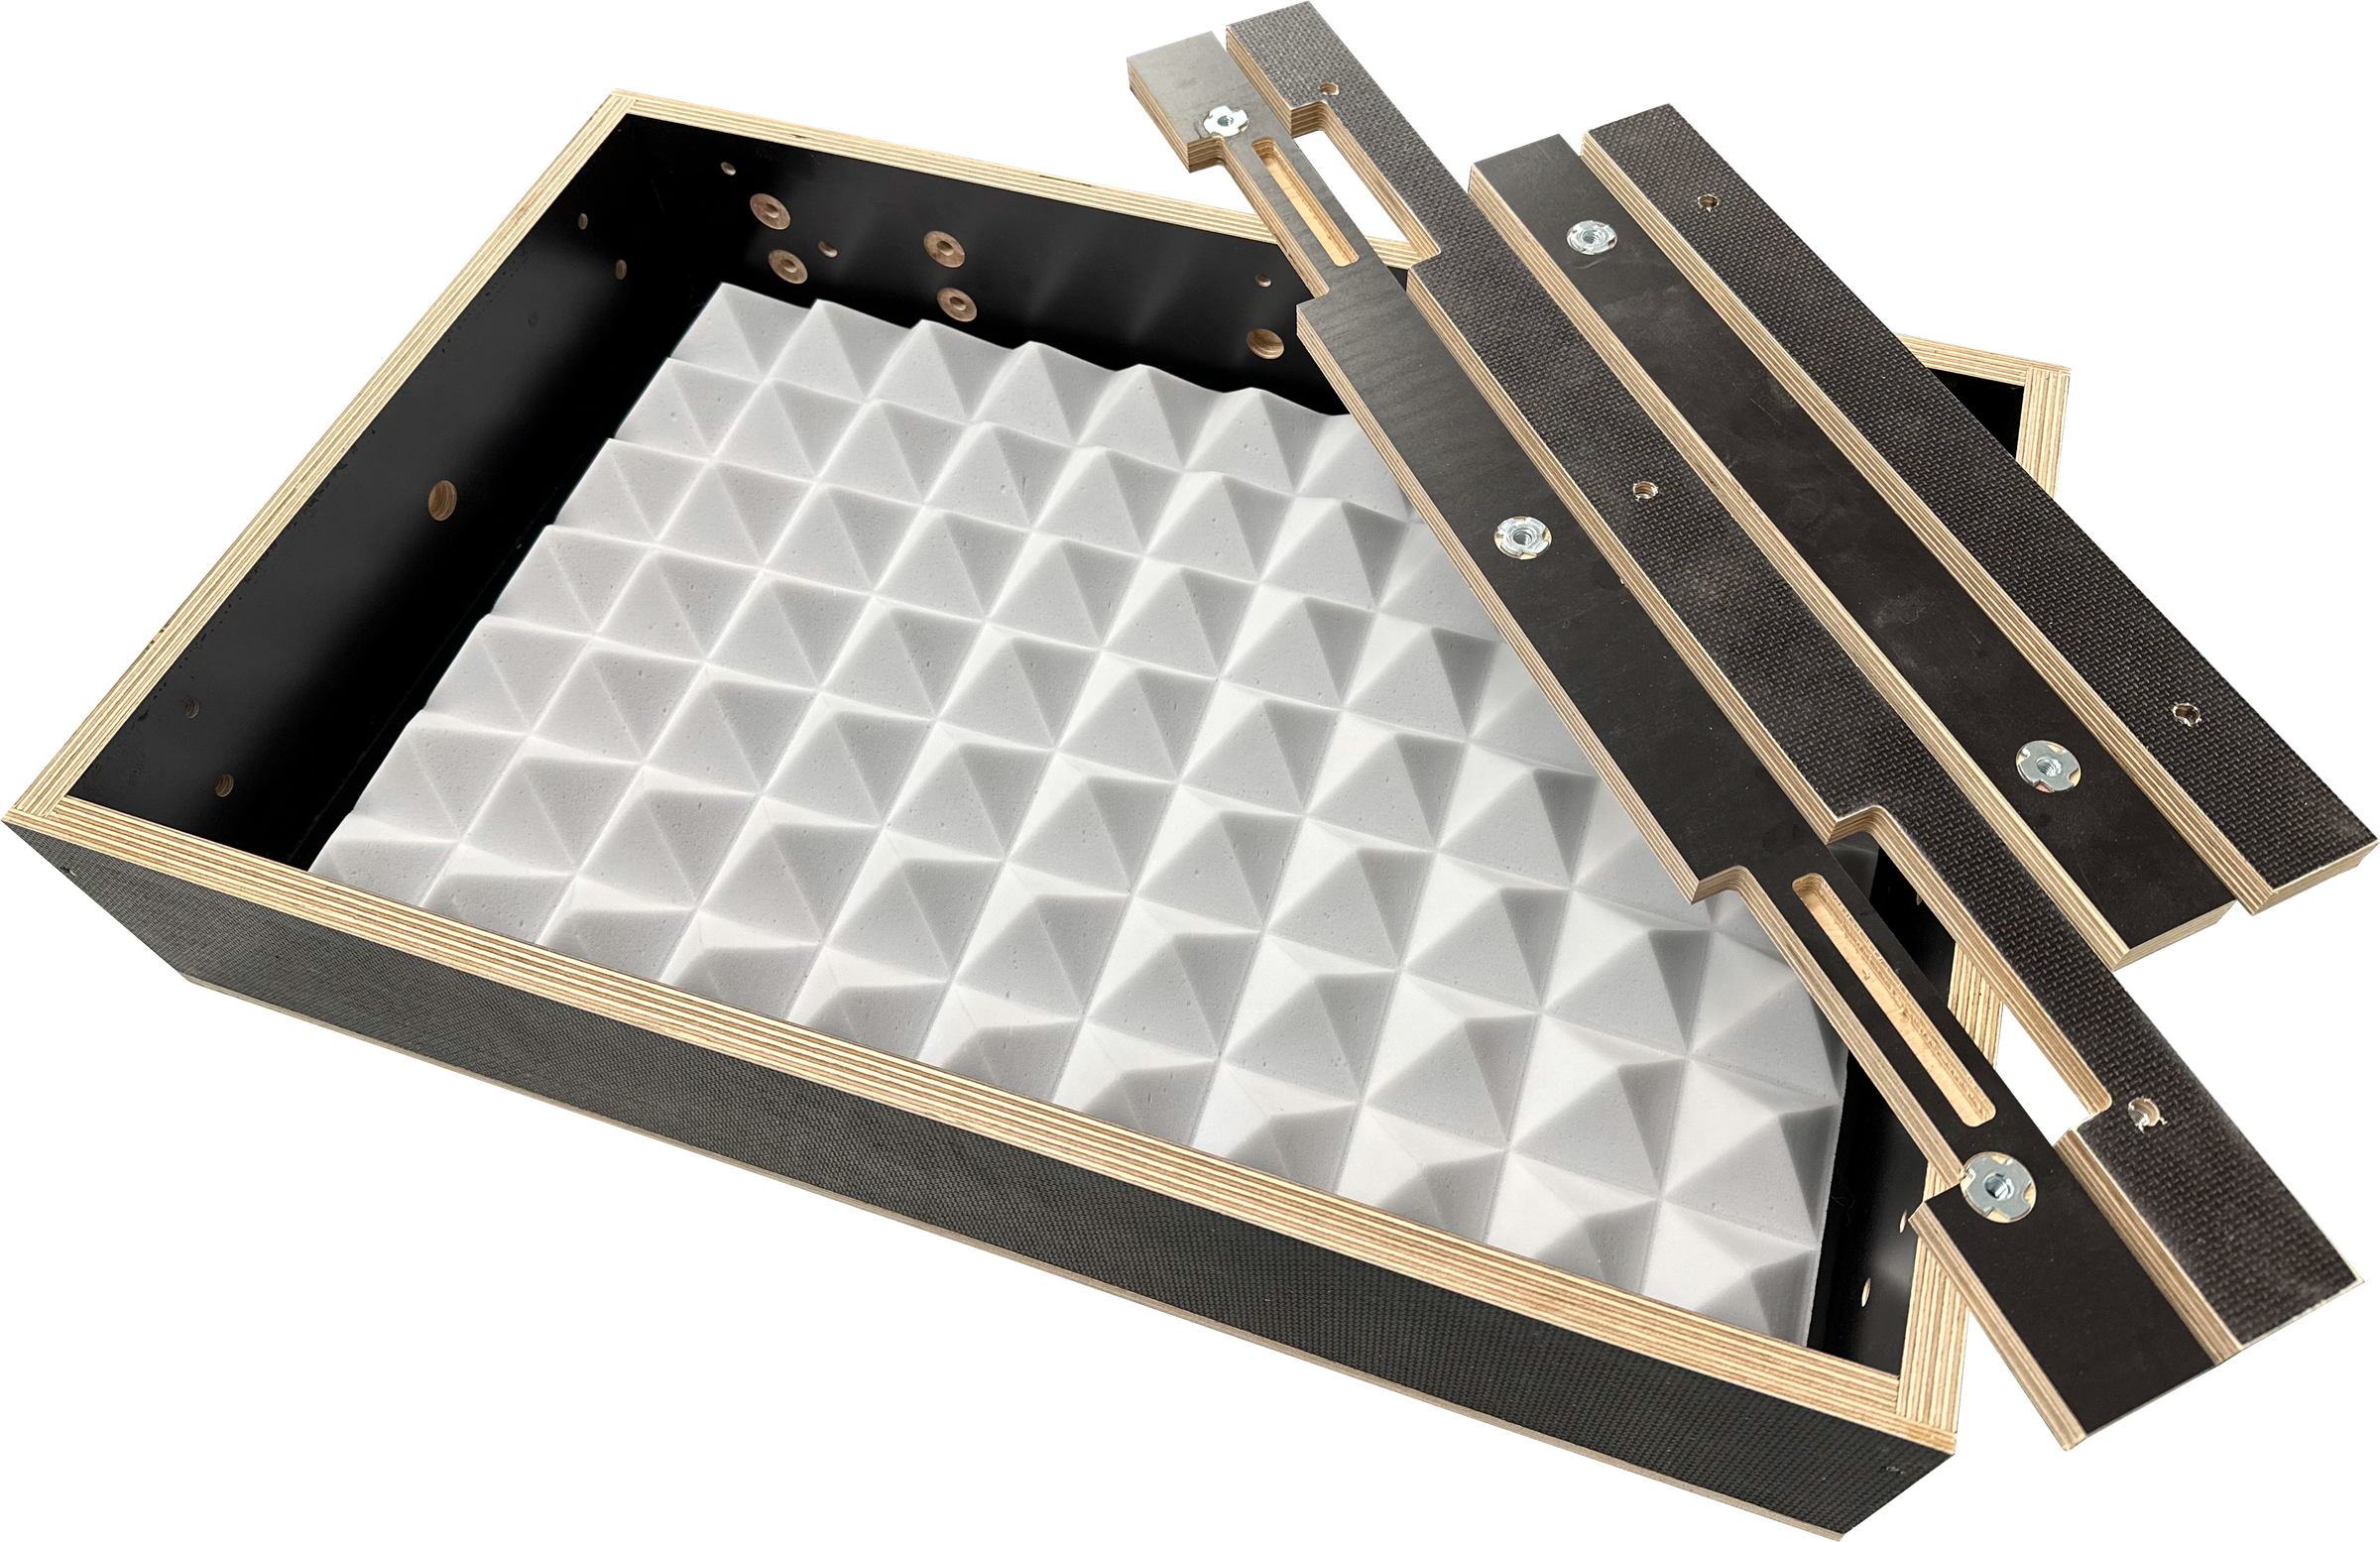
El marco de instalación se suministra de serie con prensaestopas de alta calidad y alivio de tensión integrado de OBO, material aislante de Basotect®, así como un panel en blanco de OSB y listones de alineación.
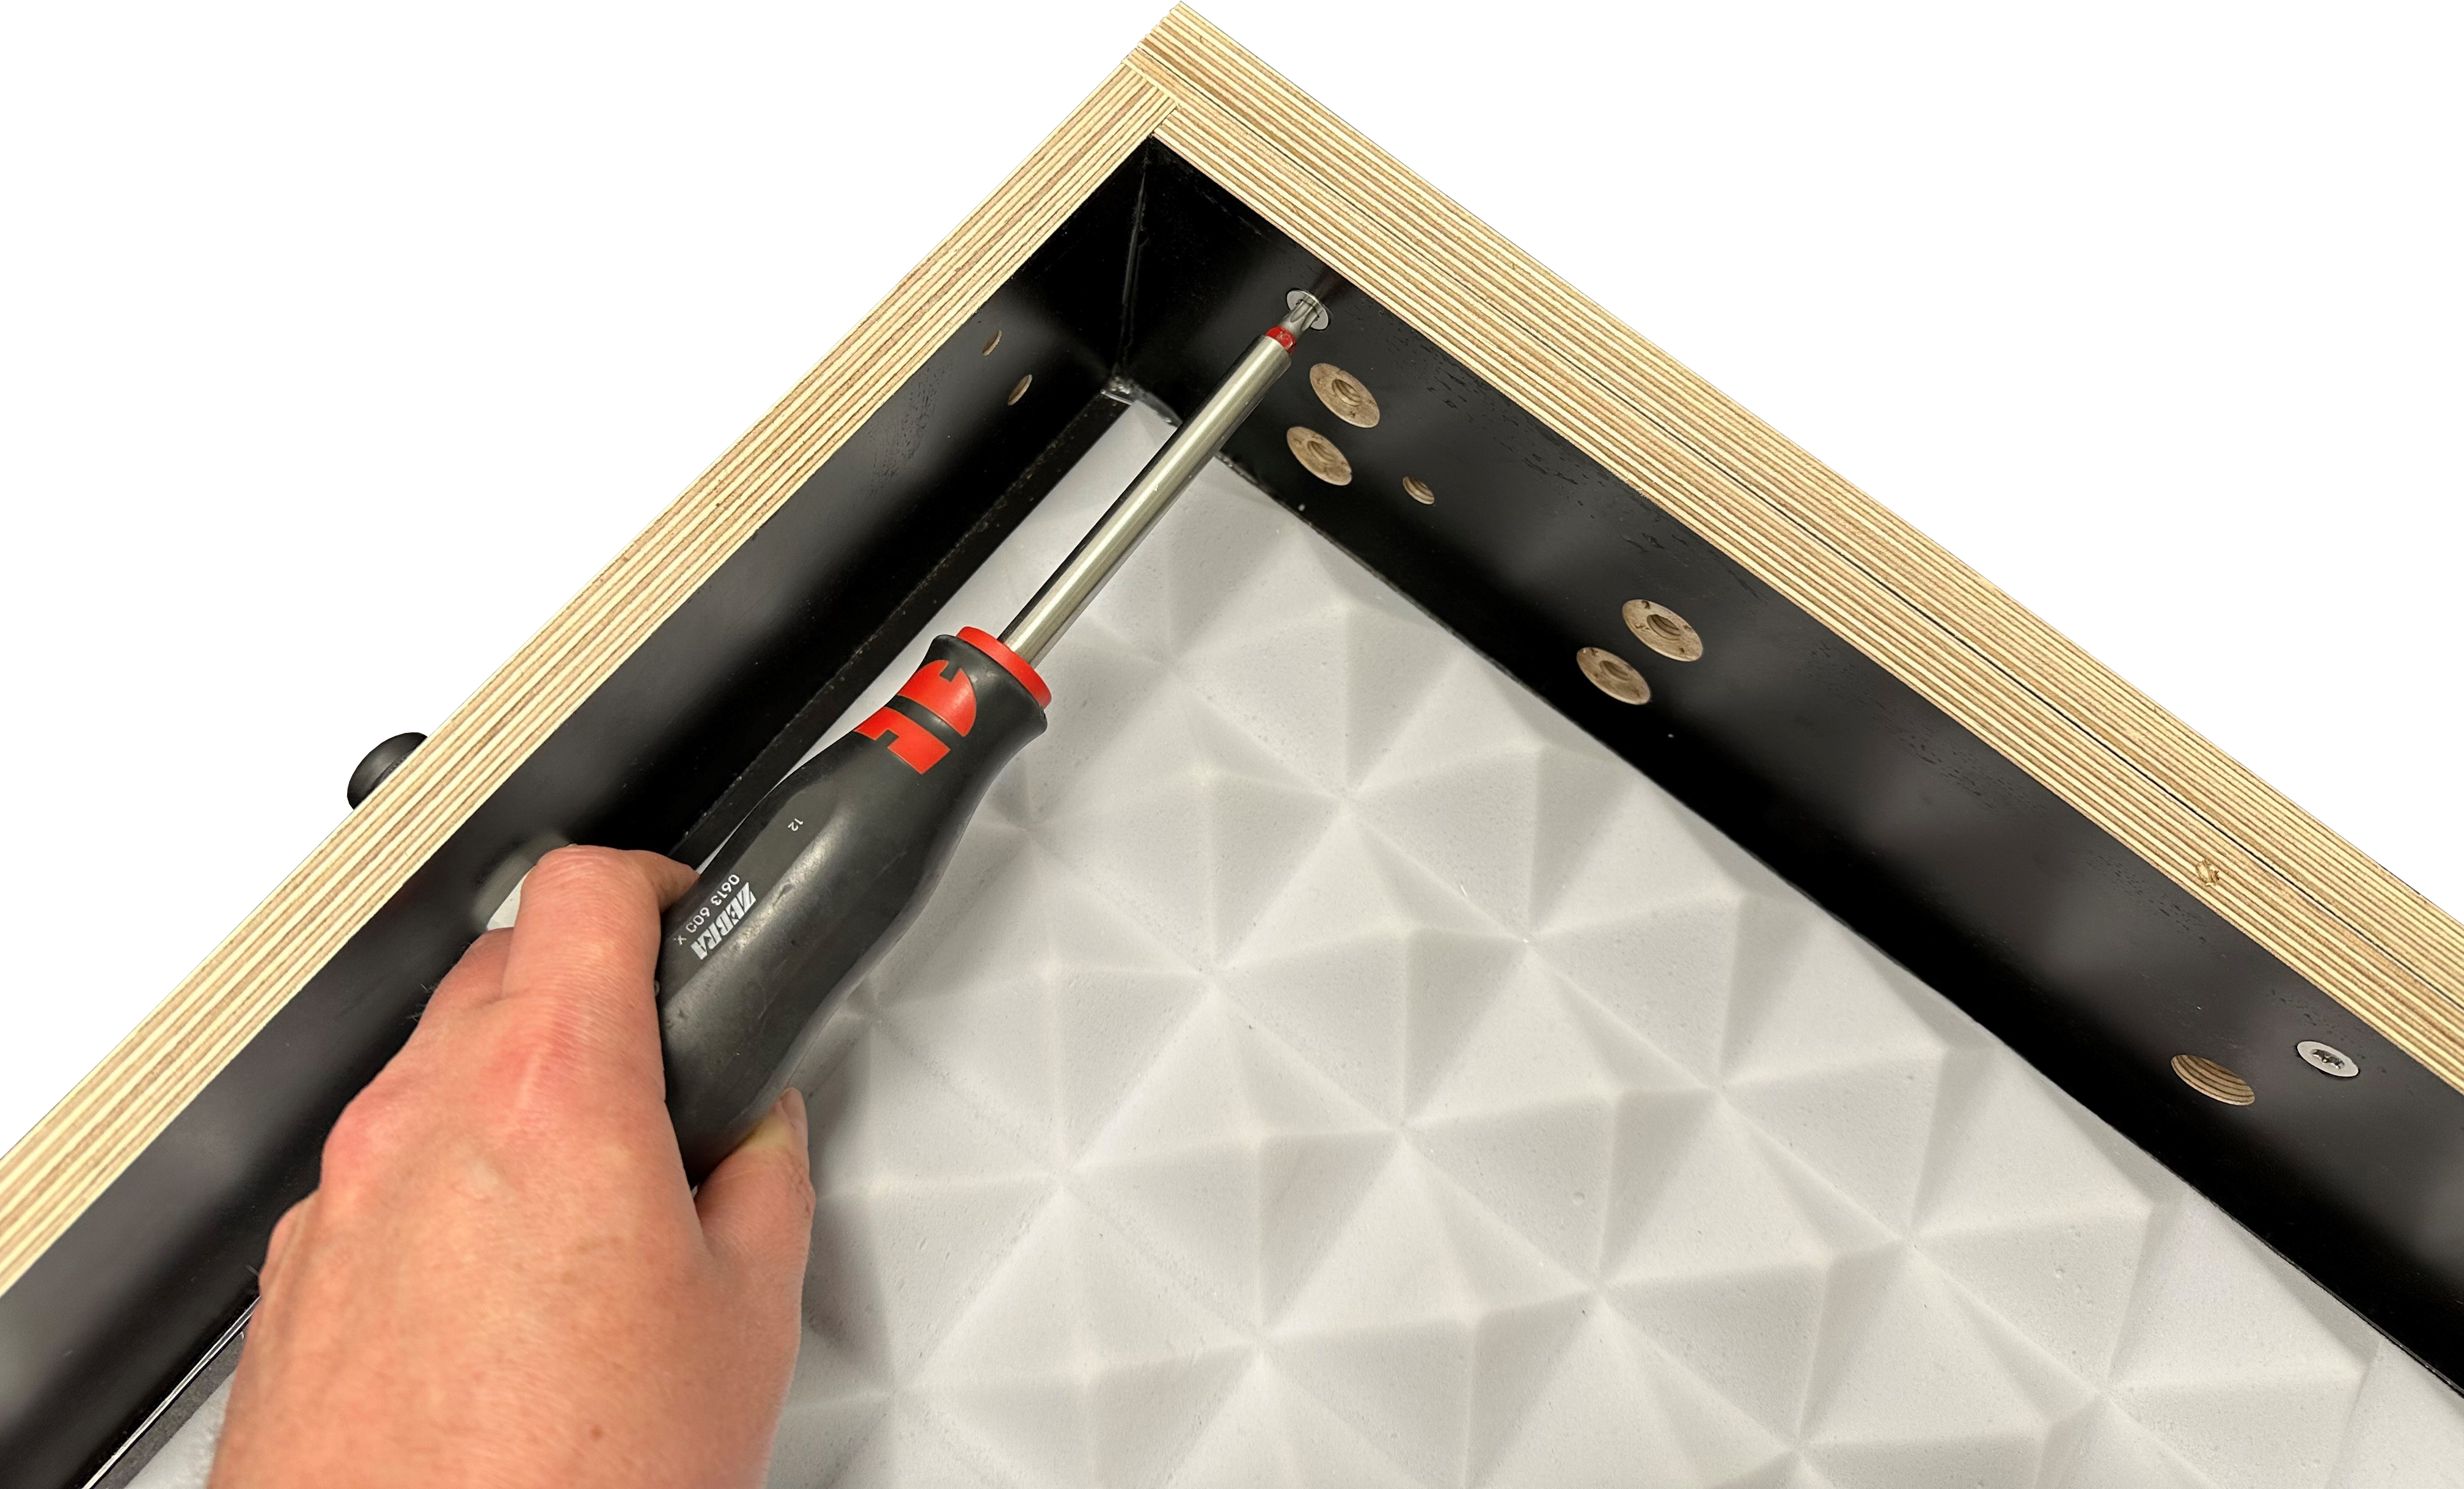
La instalación es sencilla: los orificios pretaladrados de fábrica se amplían con un taladro adecuado para la aplicación deseada y, a continuación, se colocan el prensaestopas, el material aislante y los accesorios necesarios.
tamaños e información para:
- 4062 architect
- Solo para paneles de yeso: muy poco profundo, solo 5 cm, altavoz incluido.
- ¡Utilice la configuración DSP de Cerasonar con el preajuste correcto para obtener la mejor calidad de sonido!
- Las placas de yeso se pueden atornillar alrededor de toda la placa frontal de la carcasa (longitud del tornillo no superior a 25 mm).
- Dimensiones: 55,5 x 77,5 x 3,7 cm
(4,9 cm, incluida la placa OSB) - Peso: X,X kg
tamaños para:
- 1520 & 2525 fit
- 4062 reference (pro)
- Recorte para la instalación: 42 x 64 x 14 cm
- Dimensiones: 40,0 x 62,0 x 12,0 cm
(13,2 cm, incluida placa OSB o placa de instalación fresada con CNC para 1520 y 2525 fit) - Peso: 4,8 kg
tamaños para:
- 6062 reference (pro)
- 6062 sub
- Recorte para la instalación: 62 x 64 x 14 cm
- Dimensiones: 60,0 x 62,0 x 12,0 cm
(13,2 cm, incluida la placa en blanco OSB) - Peso: 7,1 kg
tamaños para:
- 4080 ultimate
- Recorte para la instalación: 42 x 82 x 14 cm
- Dimensiones: 40,0 x 80,0 x 12,0 cm
(13,2 cm, incluida la placa en blanco OSB) - Peso: 6,1 kg
tamaños para:
- 10040 sub
- Recorte para la instalación: 42 x 102 x 14 cm
- Dimensiones: 40,0 x 100,0 x 12,0 cm
(13,2 cm, incluida la placa en blanco OSB) - Peso: 7,7 kg
tamaños para:
- 13362 sub
- Recorte para la instalación: 135,5 x 64 x 16,5 cm
- Dimensiones: 133,5 x 62 x 14,5 cm
(15,7 cm, incluida la placa en blanco OSB) - Peso: X,X kg
marcos de instalación (cajas traseras) - DESCARGAR